Monday, April 21, 2014

UPDATED 04.28.14 - Betzy's Designs -- Contact Information, Web Pages, Pictures and More !!

Hey there, 
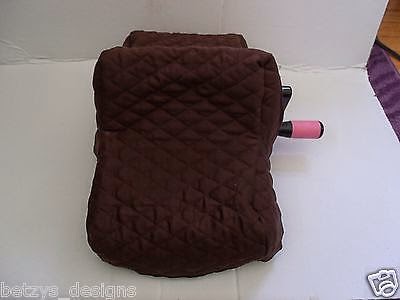
I hope everybody is doing well !! I wanted to make this post to introduce everyone to a very talented woman named Betzy Flores. She is the amazing woman behind The Cricut Machine Covers that I've been talking about ever since I got mine a month ago. She makes a cover for every Cricut Machine made, including the Cuttlebug !! She also makes Silhouette covers and much, much more !! 

From L-R: Cuttlebug V2 w/Cover, Middle: Explore w/Cover, L- Customized Pouch with Velcro closure for Cuttlebug A & B Plates, w/Custom Embroidery. 
She has many, many different fabric and color choices, great prices, and most importantly, Professional Quality !!

Her Contact Information is: 


Facebook: http://www.facebook.com/betzysdesigns 

Link To FB Album w/Fabric Choices: Fabric Choices FB Album


Here is a sampling of her fabric and embroidery color choices, but please keep in mind, this is just a SAMPLING of the choices, please visit the above links for the FULL selection, as I just don't have enough time or room to post ALL her choices, there are SOO many !! 
(If you can't tell, I'm REALLY excited about this post, because I am very passionate about her products and am completely in LOVE with all of them. So far I have 3 of her products, and on pay day, I will be buying MORE!!) 

Ok, are you ready for a BUNCH of pictures? These are some of her product options by Machine, and also some of the other products she offers. Please remember: These are just SOME of the Fabric choices, colors, products, etc. that she offers, please check out her links above for ALL your choices, and if you don't see what tickles your fancy, please send her a message and she may be able to provide you with even more options !! 

Here we go, Picture Time !! Please make sure to read the caption on each picture for the information regarding that picture !! 

Cricut Machines & Covers:

Cricut Explore:


The NEW Cricut Explore! Animal Print Dust Cover


Cricut Explore - Green with Pink Sides and Cricut Logo
'
Cricut Explore - Large Damask Print


Cricut Explore - Small Damask Pattern w/ Pink Cricut Logo


Cricut Expression:


Cricut Expression Cover - Brown w/Blue dots, sides, and Cricut Logo


Cricut Expression - Pink w/Green Flowers and Cricut Logo


Cricut E1 and E2 Cover - B & W Chevron w/ Pink Sides and Cricut Logo

Cricut Mini:


Cricut Mini - B & W Chevron w/ Pink sides and Cricut Logo 


Cricut Mini - Multi Colored Damask with Pink Logo


Cricut Mini - Cancer Awareness Ribbons


Cricut Mini - Small Damask Design w/ Pink Logo


Cricut Mini - Large Damask Design w/ Pink Logo

Cricut Mini - White Quilted material with Green Logo


Cricut Mini - Machine and Pink with Green Dots and Logo


Cricut Original Personal Cutting Machine:


Cricut Original - Large Damask Pattern w/ Green Cricut Logo

Cricut Cuttlebug:


Cricut Cuttlebug V2 - B & W Scroll Work w/Green Cricut Logo


Cricut Cuttleug V2 - Brown w/ Circles and Pink "Cuttlebug"

Cricut Cuttlebug V2 - Black w/ Green Logo


Cricut Cuttlebug V2 - Pink w/Green Dots and Cricut Logo

Now remember, this is just SOME of what she has available. She also has cover for the Sizzix Big Shot, seen here: 


She also does custom Business Card holders, Medium and LARGE tote bags and much much more. Take a look: 
Customized Luggage Tags

Luggage Tags, easy to spot your luggage, easy to keep it separate from others luggage. 

You choice of ribbon and Wording.

Silhouette Cameo Covers

Weight Watchers Calculator Holder

Weight Watchers Calculator Holder


Large Tote Bag w/ your choice of Ribbon across the top. Dimension are 20" Wide and 14" Tall, PERFECT for taking to crops, picnics, anywhere really!! (I've already ordered mine !!)

Large Tote Bag -- Look how awesomely BIG it is !!

And last but not least: 


Custom Business Card Holders !! 

With all those choices in product, pattern, color, and custom options, how can you NOT go crazy ordering from her??? So please, check out her links, contact her or myself with any questions and place your order today !! 

My e-mail address is: sirensong25@gmail.com, so if you need to get a hold of me, do it there, or on Facebook, by PM-ing me or Tagging me in a post, and I will get right back with you !!
So go check her out !! You won't regret it for a moment !! 

Thank you, 
Corinne 

Just some cards... ;)

Hey there!! 
It's been a little while since I've made an actual crafty post.  Things have just been CRAZY for me lately, maybe more on that later, or in another post. What I really want to get to is posting some of the cards I've made lately, and I'm going to get right to it. I am going to TRY to do this is chronological order, but "try" is the operative word here. Ok, diving right in! 

Wow, ok, I just looked back at the last cards I posted on here, and it's been A WHILE!!! I guess this post will be chock full of pictures !! Hope you guys enjoy!! 


Lattice Card, made on 04.06.14
This is when I started really using the intricate cuts that my new baby, The Cricut Explore, is really capable of doing!! I really love playing with the Lattice, Lace, Doily, Etc cuts, because I was never able to get to get this intricate of cuts with my old Cricut, the ORIGINAL! So this has really been a lot of fun for me!! 


Doily Card, made on 04.07.14
Here is another example (just one of many to come) of me enjoying the intricacy the Explore is capable of. I stamp the sentiment, used embossing powder, heat set it, then came in on top with a slightly different shade ink, using the same stamp, and made the shadow, I then use just a DAB of stamp cleaner on the corner of a little make-up sponge and cleaned the ink of the embossed part only, achieving the shadow effect!! I really like how that turned out! 


Machine Written Sentiment, "Happy Easter" w/Lattice overlay background. Front of Card. 
 I used the wonderful new feature on the Explore called Write and Cut to write the sentiment "Happy Easter" and cut out the beautiful Fleur De Lis pattern out, and added a layer with Lattice work on top of a plain rectangle background with sparkly pink ribbon that I used my tape runner to glue down. I then embellished it with Pearl embellishments. I had intended on sending this to my grandmother, but I completely forgot about it, until just now actually. BUMMER !! :( Maybe I will still send it to her. 


"Hoppy Easter" Bunny Sentiment Stamp, heat embossed with purple embossing powder. Inside of card.

The inside of the card is really boring, and if I am going to send it to my grandma, I definitely have to do some more work on it. Maybe I will add some Washi Tape or some ribbon, we will see. If I do add more to it, I will make sure to post it, promise !! I really don't have much to say about the inside of the card, I'm kind of disappointed with myself for leaving it like that !!


Flower Lace Overlay w/Patterned Background - Front of Card - 04.08.14
 Another intricate cut, this time it is a Flower Lace Overlay, with colorful patterned paper in the background. I just LOVED this overlay, so I decided for it to be the entire focus of the front of my card, I didn't mess around with any embellishments or sentiments on the front, just a simple, yet intricate Front.

"Hoppy Easter" Bunny Sentiment, with Pearl and Fabric Flower Embellishments. 04.08.14
On the inside of the card, I again used my "Hoppy Easter" bunny stamp with Blue ink and clear embossing powder. I embellished the inside just a little bit. I'm not really very happy with the inside of the card, I don't like the embellishments, and I think there needed to be an insert paper glued down and the sentiment stamped on top of that. Oh well, you do, you try, you learn. 


Machine written sentiment, "Just Because", with lovely curly border and heart embossed background. Front of Card. 04.11.14
This was the first card I made after I got my Cuttlebug!! I'm STILL trying to get the hang of when to emboss, when not to; what to emboss, what not to; which folders to use on what shapes, etc. But I used the D'Vine Swirls embossing folder on the purple card bade, and Love Language Hearts folder on the darker pink background. I love the green curly border around the sentiment, and of course, I LOVE my jeweled brads !! 


Inside Of Card- Machine written sentiment to complete the front sentiment. Embossed border around it. 04.11.14
For the inside of the card, I again used the machine to write the sentiment I wanted to complete the front sentiment, "Just Because I Love you". I welded a vine branch to the layer with the sentiment so that it was cut out in the corner, giving you a little peek at the embossed purple card base. I then cut out a heart border and of course, embossed it using my Love Language Heart Cuttlebug folder. I think that is about all there is to say about this card. Moving on!!


Front of Card- "Because" Machine Written sentiment, button border, embossed background w/slight distressing. 04.12.14
For the front of my card, I really had a lot of fun! I just LOVE all the COLOR on this card !! I didn't really even plan it to be so bright and colorful, it just kind of happened! Happy accidents are gladly accepted! I embossed every layer, and distressed the bottom layer using a nail file, as I didn't have any sort of sanding paper or tools except for the nail file. I think it did the job just fine. The folders I used to emboss the layers are as follows: Purple Bottom Layer: Swiss Dots Cuttlebug Folder, Blue Middle Layer: D'Vine Swirls Cuttlebug Folder,  Pink Top Layer: Love Language (Hearts) Cuttlebug Folder. Then I added a cut out button frame, and embellished it with some of my favorite colored buttons that matched the colors I used on the card. I just hot-glued them on to the Green button border. And of course, the Machine Written Sentiment of "BECAUSE..." 


Flourish Border "I love you" Cutout with black background. Inside Card, 04.12.14
This is the inside of my "Because..." card, the complete sentiment being, "Because... I love you". I just loved how it looked, from the border to the cursive writing, it was perfect! I had so much color and embellishing on the front of the card, I tried to keep it pretty simple on the inside of the card, and just glued the black square to the back of the pink "I love you" cutout, and then embossed it with my Cuttlebug using, once again, the Cuttlebug Love Language (Hearts) Folder. (Sorry, I only have 5 folders and 1 die, I haven't really used the die yet except to test it out.) I really love how this whole card turned out overall !! What do you think??

So that is all for now. It's about 01:40 AM and I still have a card I really want to cutout and put together! I'll post again very soon with the last couple of cards, and a very interesting story about something that happened to me last Monday, 04.14.14. 

Leave me feedback here (You don't have to create an account, but please leave me your name, at least a first name so I can respond!!) or if you see me on Facebook, hit me up there !! I hope you enjoy my blog, and if there is anything you want to see, read, know about, or anything else, PLEASE let me know !! 

------
Corinne 

Wednesday, April 16, 2014

Explore Giveaway--- Link inside !!

Hey there, posting this for all my readers. This place is giving away a free CRICUT EXPLORE !!!

The Idea Room Cricut Explore Giveaway !!

Go check it out and enter to win !!

-----
Corinne

Tuesday, April 15, 2014

Internet HELL Day...

UGH !!! I am sooo frustrated !! I had a horrible day yesterday, and today, all I wanted was a relaxing day of crafting. So what happens when I wake up this morning? Our internet is out, due to Routine Maintenance, and I can't use my Explore. So what do I do? I call T-Mobile to set up a one day Wi-Fi Internet HotSpot so I can use the internet on my Laptop and my explore. Well it worked great for the internet, but not so great for cutting with my Explore.... in fact, not at ALL with my Explore. So I just designed a beautiful card, tried to save it,  and the Internet crashed.  UGH AGAIN!!! So I gave up for a while and took a nap, and luckily when I got up from my nap, the internet was working finally, YAAAAAY !!! So I go to log onto to Design Space, and guess what, I have to upgrade it... which is great, except it took forever and was a pain in the butt. Then after that I finally get logged into DS and am ready to design a card, and discover my trial subscription has run out !!! UGH !! So I go to log onto cricut.com to renew my subscription and I can't get their website to open. It keeps giving me an error message !!! Finally after messing with it for about 20 minutes I come up with another creative solution, Use my old browser, Mozilla Firefox, to log onto Cricut and renew my subscription. It worked !! FINALLY I was back in action. I designed what I think is a beautiful card, cut it out, and put it in a little baggie. I have 2 doctors appts tomorrow, one where I have to wait 30 minutes for my dad to be seen after me, so I will have something to do during all that time. I have scissors, adhesives, embellishments, everything. and all in my big purse I bought this weekend. (Pictures of my Traveling Storage Solutions will be posted tomorrow hopefully, these are only to tide me over until I can get my rolling scrapbook storage tote. But I LOVE my purses I bought and will definitely be keeping them after I get my real scrapbook tote. But I gotta tell ya, I'm super excited about the tote I'm getting !! It will hold just about EVERYTHING !! Anyways, it's getting late and I will add more tomorrow. 

Thanks, 
Corinne

Tuesday, April 8, 2014

OLD INFO!! SEE FUTURE POST(S) FOR UPDATED INFO!! Some info Regarding Frequently Asked Question Regarding Cricut Explore!!

THIS INFORMATION IS NO LONGER CORRECT, THEY HAVE DONE AN UPDATE TO THE SOFTWARE AND MADE IT MUCH EASIER. I WILL POST THAT INFORMATION VERY SOON !! Thank you, Corinne -- 04.21.14

Ok, I just got off the phone with Riley at Cricut Explore Customer Service, and I asked her several questions I have seen floating around here in post or comments. So here we got:

** WRITING AND CUT FEATURE: Ok, she gave me step by step instructions on how to do this, if you have an easier way of doing it, please feel free to contact me personally and I will amend this post. (I ask you to contact me personally rather than post it in the comments because it will make it easier to keep my blog updated as well.
Here are the steps: (and yes, I tried them exactly as written and they worked like a charm!!!)
STEP 1 – Choose Background to write on.
STEP 2- Change layer to Write (from cut)
STEP 3- Ungroup Background.
STEP 4- Type It out
STEP 5 – Ungroup Text (remove background if necessary)
STEP 6 – Press CTRL and Select Each Letter and Layer/Background.
STEP 7 – Right click, ATTACH
STEP 8 - Cut Put Pen In Clamp A and Press GO !!
**  MACHINE BEEPING: If your machine beeps with every cut, especially Intricate cuts, THAT IS NORMAL. It is the engine/motor that makes that noise. There is NO way to turn that off,

**  LIGHT(under under-carriage): If you machine has a light that works, lucky you, but if it does NOT work, THAT IS NORMAL, the light is there for future purposes where they plan on adding a printing functionality, (Print and Cut Feature) No ETA on that yet.
Hope this helps all helps at least 1 person!!!


I will be posting more later on, I just wanted to get this info on here asap!!

Monday, April 7, 2014

Hello there, 
So it's been a few days since I have written in here, mostly because I've been too tired, and the irony here is that I woke up Bright Eyed and Bushy Tailed at 3:30 Am!!! So I thought I would make this short and sweet and show you the last couple cards I've made!! 

I'm LOVING my new Cricut Explore!!! It's makes cutting intricate details seem like its cutting through butter !! I've never made such intricate cards in my life !! Check out a couple more!! 


I also went back to Michael's and spent WAY too much money, but got a new sheet of cling stamps and FINALLY got myself those acrylic blocks you need to mount them too. I also got some color embossing powder, new ink pads, and some embellishments. I got a new box for my inks, and I need to go get 2 more, one for my every day stamps, and one for my embossing powders and stuff that goes with it. 

I also think I may have found a solution to the Magnetic Spice Rack/ Embellishment storage idea. Over in there ribbon department, they have these packs of 30 tins for something like $12.99, maybe $19.99, either way, it's a phenomenal deal compared to how much the real thing cost !! (They cost as much as $150.00) and I would just buy the magnets there, and glue them to the bottom, then spray paint a cookie sheet maybe a Bright Pink or something, and stick 'em on !! Voila!! DIY project success, and lots of storage to boot !! Next month maybe !!

Anyways, tbat's all I've got for right now, I'll ttyl, 

Corinne

Friday, April 4, 2014

So much to talk about!

Hello all,  I really do have several different topics I want to cover, so please forgive me if I jump around a bit. 

I'm pretty excited because I am FINALLY getting a Cuttlebug embosser and die cutter,  and I did it without having to pay full retail and am still getting a NEW one!  Originally I ordered it from a guy on eBay,  but then today my dad (whose account I used to to buy it) got a message saying that he was actually out of stock and wouldn't be able to fill my order,  he promptly refunded the money and suggested Amazon.  So I checked out Amazon,  and even with shipping it turned out to be a buck cheaper,  but the downside is I won't get it until between the 14th and 17th of April,  which is kind of a bummer since I've already bought one of my favorite folders for it.  Oh well.

I've decided that it time to part with some of my duct tape collection,  just the duplicates that are mostly still in packages.  I think we've figured out that I will make more money selling them individually than as a lot as originally planned. I will also be selling my old Cricut as soon as I can find the bag for it.  I need the money this month.

Jumping around again,  we finally got that coffee table I had been working on out of here and in to storage and brought my super awesome table home, and Holy cow!  I have SOOOO much more work space,  even with the one side down.  I just LOVE it!

I will edit this with some pictures and more info later. .. Until then!
Corinne