How is everybody doing? I hope everyone is well. I am starting to do better as well. (I just realized I haven't updated the story that comment refers to yet. I will try to do that tomorrow. For right now, I will just tell you that last Monday, 04.14.14, I was assaulted and my ear drum was ruptured, and my glasses broken. I am doing ok now, and promise I will post the WHOLE story soon. Tonight, I am just too tired to do it!!)
But for now, let's keep it LIGHT and FUN !! I just wanted to post a couple of photos of cards I made in the last couple of days, and also some storage solutions I am currently using in my Craft Area. (I don't have a "Craft Room" per se, more like a Craft "Area" in our living room. But I'm lucky to even have that! So you won't hear me complaining about it, except to say that I can't wait until we can move to a better place and my bedroom will then become my "Craft Room", which is just fine with me !!)
So here we go, Here are the 2 cards I wanted to show you:
This one is a Birthday card for a relative who shall remain nameless until they have actually received the card. Could be a couple of months, or sooner. I won't say!! ;P
 |
| This is my Tri-Fold "Iron Work"Card, I've made the picture Extra Large so you can see all the little details! |
So this is my first Tri-Fold Card, but it didn't start out that way. I didn't follow any kind of template, which is the norm for me, I like to make it up as I go along. It started out as a Bi-Fold card with the iron work and layers are on the front, and the Fleur De Lis Pennent on the inside. But then I found this image of the iron gates and I just knew it HAD to be added to the card, if you look closely at the top right picture, you can see the iron gate, and at the bottom I made a score line so that just barely 1/8" would bend over to the back of the card on both the back and the purple layer.
Next Card !!
This is something I just whipped up in about an hour or 2, nothing too fancy, but I still love it. I'm starting to discover that even the simplest cards can still be beautiful.
So, this is my Houndstooth Card, and I like how simple it is. Only took me about 1-2 hours to make, and that is because I kept getting interrupted. On the front of the card, I cut out a Houndstooth Overlay for that bottom layer and glued that directly to the base of the card, then I just added the double layered Label with "Just a note to say..." written on it using my Cricut Explore and my Metallic Blue Cricut Marker. After gluing the labels together, I ran them through my Cuttlebug using my Houndstooth Embossing Folder. On the inside, I kept it super simple, maybe TOO super simple, but oh well. I cut out the brown layer and wrote the rest of the message, "Hello !!" using my Cricut Explore and my Metallic Copper Cricut marker. I really like how the Copper Marker looks against the brown background.
You cant see it, but I also embossed the back of the actual card (the dark blue card base) using my Houndstooth folder as well.
So, what do you all think of my cards posted here? Please leave me some blog love in the form of comments on my blog post !!!
I also wanted to ask for your feedback on what you all think of my new Watermark for my photos? I'm using 2 new programs for my pictures and my watermark. I'm loving the ability to combine the different pictures into 1 photo collage, but I'm not sure about the watermark. I love the font, but is it too opaque? Does it get in the way of the card? Can you still see the details of my cards? Any feedback or "Blog Love" you can leave would be greatly appreciated !! (Remember, I have changed my settings so that anyone can leave a comment, you do not need to make an account if you don't have one already, but if you are from one of my Facebook groups, I would love it if you left your name, and what group I know you from!! That way I can make sure I thank you properly!!)
Now onto those storage solutions I promised at the beginning of the post !!
Sooo, anyone that really knows me knows that not only am I obsessed with crafts, craft products, embellishments, paper, etc, etc, I am also absolutely OBSESSED with storage solutions !!! In the photo collage above, the pictures are as follows:
TOP LEFT: Marker Storage- I store my Artists Loft Dual Tip Markers in a snap-tight plastic tupperware.
(Just FYI- As far as marker storage goes, the following rules apply- For Dual Tip Markers, they should be stored FLAT or Horizontal so that the ink flow stays at both ends, if you store them vertically, it's likely that the ink will flow to the end pointing down, and the end pointing up will dry out. For Single tip markers, for the most part, they should be stored Tip DOWN, so the ink flow stays at the tip of the marker.)
TOP MIDDLE: EMBOSSING FOLDER STORAGE- I've tried several different options for storing my embossing folders and have not been happy with any of them. Then, the other day my Grandpa brought over this plastic red square bucket with a handle on it, (it had some goodies for my dad inside of it.) and a light bulb went off in my head! It's the perfect size and shape for all my folders!! (as you can see, I don't have very many yet, as I just got my Cuttlebug, but soon I will have LOTS (my birthday IS coming up in June, and all I want are scrapbooking, embossing and cardmaking stuff! From EVERYONE!!). You can see a close up in the TOP RIGHT picture. I used my Cricut Explore to make the dividers, they measure at: 4 1/2" Wide x (half way between) 7 3/8"-7 1/2" Tall. Then I wrote the Brand of of Folder, the Name of the folder, and the number that corresponds with my little tags that show what folders I have available. I have a picture of the tags below:
After I have numbered them and titled them, I run them through their corresponding folder so I know what it looks like when embossed, and I can always just grab this, hold it up to my project and see which folders might look good, and which one's don't look good. PLUS, I keep it in sight because I believe that if you see it, you will use it !!
Next up, my ribbon storage. I've gotten a lot of compliments on my ribbon storage even though it is super easy, and not even my original idea, most of the ideas listed here, I've gotten off Pinterest! Including this one:
I left this one up to my dad to do for me, (thanks dad!) simply because my hands weren't strong enough to bend the metal into a hook to close it back up. How he made this is, he took one side and snipped it where the side piece meets the bottom piece, and then using pliers he took and bent the bottom piece into a small hook, and the side piece bent just so, so that the hook had somewhere to latch onto. It was really simple and took less than five minutes to do. I keep it hanging on my lamp right next to my machine on my craft table (since I don't have my own craft room, I have to make every square inch of table space count, which include going Vertical when I can!!!).
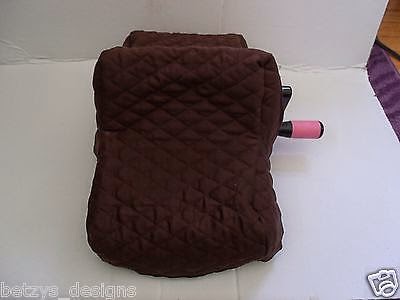
BOTTOM - DUST COVERS AND A,B, & C PLATE STORAGE- From Chevron and Pink w/ Pink Logo Dust Covers. LEFT - RIGHT: Cuttlebug Dust Cover, MIDDLE: Explore Dust Cover, RIGHT: Velcro Closure Embroidered Pouch (custom made) For my A, 2 B, and C plates for the Cuttlebug.
***If you are interested in getting one of these dust covers, please check my previous post regarding these covers and many other products, or just click HERE and it will take you to the post.***
FAR LEFT: This is a wine rack that I have decided to use for my Vinyl Storage! I bought it at a yard sale for about $1. It's perfect, keeps my Vinyl within reach, but rolled up so there are no wrinkles, I just LOVE it.
TOP RIGHT: These are 2 purses I bought to take my cardstock and scrapbook paper with me to a crop that fell through, but they work great for taking card's that I've cut out and need to put together and embellish on the road with me!! Especially the one on the far right. I take it with me everywhere and that way I don't have to be stuck at an appointment, waiting, without anything crafty to do!!
BOTTOM RIGHT: This is a Large "Cooler Bag" that is insulated, I guess so you can carry your beer and ice in a bag instead of a regular cooler?? I'm not really sure, all I know is that it's cylindrical shape and deep depth (proper grammar?) make it IDEAL for carrying around all my embellishments to crops!! It really holds a TON!!
BUT... and it's a big one! In the very near future, I am hoping I will not need to use these bags as much for crops, because I am hoping to get this (from JoAnn's with one of my 2 50% off coupons, and then buy some other necessities their as well, because I also have a 40% off coupon! I hit the Coupon Jackpot !!):
So that is exactly what I am hoping to get on Pay Day!! I can't even wait !! It will even come in handy when we move, because I will still have my scrapbooking and card-making supplies and paper with me, and won't have to wait until I find the box I packed it in!! As you can tell, I'm pretty excited about this little Rolling Tote here. I've been looking for one and researching them for months, but when I found out I had these coupons, I just knew, NOW was the time to purchase this particular item !!
So that's about all I have for now, If you have any good storage solutions for your crafty items, please leave me a comment, and pictures of them if you can !! I would really love it !!
Well, that's all I have for now, thank you for stopping by, and I really hope to hear back from you !!
Thanks for reading, Lots of Love,
________
Corinne
Next Card !!
This is something I just whipped up in about an hour or 2, nothing too fancy, but I still love it. I'm starting to discover that even the simplest cards can still be beautiful.
 |
| This is my "Houndstooth" Card. |
You cant see it, but I also embossed the back of the actual card (the dark blue card base) using my Houndstooth folder as well.
So, what do you all think of my cards posted here? Please leave me some blog love in the form of comments on my blog post !!!
I also wanted to ask for your feedback on what you all think of my new Watermark for my photos? I'm using 2 new programs for my pictures and my watermark. I'm loving the ability to combine the different pictures into 1 photo collage, but I'm not sure about the watermark. I love the font, but is it too opaque? Does it get in the way of the card? Can you still see the details of my cards? Any feedback or "Blog Love" you can leave would be greatly appreciated !! (Remember, I have changed my settings so that anyone can leave a comment, you do not need to make an account if you don't have one already, but if you are from one of my Facebook groups, I would love it if you left your name, and what group I know you from!! That way I can make sure I thank you properly!!)
Now onto those storage solutions I promised at the beginning of the post !!
 |
| Just a FEW of my Storage Solutions, I will get more pictures as soon as I get them photographed and re-arranged! |
TOP LEFT: Marker Storage- I store my Artists Loft Dual Tip Markers in a snap-tight plastic tupperware.
(Just FYI- As far as marker storage goes, the following rules apply- For Dual Tip Markers, they should be stored FLAT or Horizontal so that the ink flow stays at both ends, if you store them vertically, it's likely that the ink will flow to the end pointing down, and the end pointing up will dry out. For Single tip markers, for the most part, they should be stored Tip DOWN, so the ink flow stays at the tip of the marker.)
TOP MIDDLE: EMBOSSING FOLDER STORAGE- I've tried several different options for storing my embossing folders and have not been happy with any of them. Then, the other day my Grandpa brought over this plastic red square bucket with a handle on it, (it had some goodies for my dad inside of it.) and a light bulb went off in my head! It's the perfect size and shape for all my folders!! (as you can see, I don't have very many yet, as I just got my Cuttlebug, but soon I will have LOTS (my birthday IS coming up in June, and all I want are scrapbooking, embossing and cardmaking stuff! From EVERYONE!!). You can see a close up in the TOP RIGHT picture. I used my Cricut Explore to make the dividers, they measure at: 4 1/2" Wide x (half way between) 7 3/8"-7 1/2" Tall. Then I wrote the Brand of of Folder, the Name of the folder, and the number that corresponds with my little tags that show what folders I have available. I have a picture of the tags below:
 |
| TOP: This show's how I have my Catalog numbered. I number them in order that I get them. BOTTOM: This shows how I title them, I just write the title of the folder across the top. |
After I have numbered them and titled them, I run them through their corresponding folder so I know what it looks like when embossed, and I can always just grab this, hold it up to my project and see which folders might look good, and which one's don't look good. PLUS, I keep it in sight because I believe that if you see it, you will use it !!
Next up, my ribbon storage. I've gotten a lot of compliments on my ribbon storage even though it is super easy, and not even my original idea, most of the ideas listed here, I've gotten off Pinterest! Including this one:
 |
| This is just a regular wire clothing hanger!! |
I left this one up to my dad to do for me, (thanks dad!) simply because my hands weren't strong enough to bend the metal into a hook to close it back up. How he made this is, he took one side and snipped it where the side piece meets the bottom piece, and then using pliers he took and bent the bottom piece into a small hook, and the side piece bent just so, so that the hook had somewhere to latch onto. It was really simple and took less than five minutes to do. I keep it hanging on my lamp right next to my machine on my craft table (since I don't have my own craft room, I have to make every square inch of table space count, which include going Vertical when I can!!!).
BOTTOM - DUST COVERS AND A,B, & C PLATE STORAGE- From Chevron and Pink w/ Pink Logo Dust Covers. LEFT - RIGHT: Cuttlebug Dust Cover, MIDDLE: Explore Dust Cover, RIGHT: Velcro Closure Embroidered Pouch (custom made) For my A, 2 B, and C plates for the Cuttlebug.
***If you are interested in getting one of these dust covers, please check my previous post regarding these covers and many other products, or just click HERE and it will take you to the post.***
 |
| MORE Storage Solutions!! And Cheap On the Go Storage !! |
TOP RIGHT: These are 2 purses I bought to take my cardstock and scrapbook paper with me to a crop that fell through, but they work great for taking card's that I've cut out and need to put together and embellish on the road with me!! Especially the one on the far right. I take it with me everywhere and that way I don't have to be stuck at an appointment, waiting, without anything crafty to do!!
BOTTOM RIGHT: This is a Large "Cooler Bag" that is insulated, I guess so you can carry your beer and ice in a bag instead of a regular cooler?? I'm not really sure, all I know is that it's cylindrical shape and deep depth (proper grammar?) make it IDEAL for carrying around all my embellishments to crops!! It really holds a TON!!
BUT... and it's a big one! In the very near future, I am hoping I will not need to use these bags as much for crops, because I am hoping to get this (from JoAnn's with one of my 2 50% off coupons, and then buy some other necessities their as well, because I also have a 40% off coupon! I hit the Coupon Jackpot !!):
 |
| Originally $129.99, with my 50% off coupon, it will only be $65.00!! |
So that's about all I have for now, If you have any good storage solutions for your crafty items, please leave me a comment, and pictures of them if you can !! I would really love it !!
Well, that's all I have for now, thank you for stopping by, and I really hope to hear back from you !!
Thanks for reading, Lots of Love,
________
Corinne